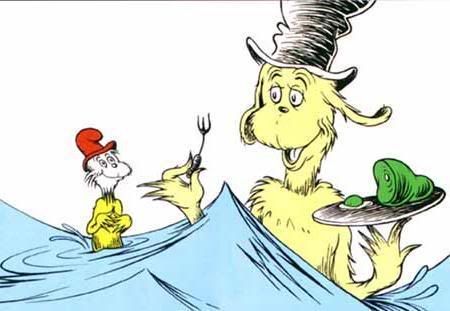
Overhead Projector and Mural Design
Well we are going to start the room in the next couple weeks. We decide to pick a Dr. Seuss theme and went with Green Eggs and Ham. We chose that one for several reasons
1. its Saris fav
2. we like the colors
3. its well known.

We found these directions on the internet and are going to give it a try. Wish us luck cause we are sure as hell not artists so we might end up with a mess :-)
Using an Overhead Projector to Transfer the Mural Design
Instructions
* STEP 1: Select a design that you'd like to paint on your wall. The design can be one you've drawn yourself or one you've found on a greeting card, in a coloring book or from another source.
* STEP 2: Make a color copy of the image you've selected to use as a reference when you're painting.
* STEP 3: Make a black-and-white photocopy of the image. Use the copy machine to enlarge the image to a size at which you can easily see all the details.
* STEP 4: Make a black-and-white transparency of your design. Ask the clerk at the copy store to help you.
* STEP 5: Place the transparency on an overhead projector.
* STEP 6: Turn the projector on and project the design onto the desired wall area.
* STEP 7: Move the projector closer to or farther from the wall until the design is positioned correctly and is the desired size.
* STEP 8: Mark the position of the projector on the floor with masking tape in case you need to move the projector before you've finished transferring the design.
* STEP 9: Outline the design on the wall carefully with pencil.
Tips & Warnings
* This is the simplest way to transfer the design to the wall surface.
* Select a simple design with a limited number of colors if this is your first mural.
* If you don't have access to an overhead projector, ask your friends. Teachers or others who do visual presentations at work may be able to borrow a projector for you to use.
* If you're planning to paint your design with light colors, use a light-colored pencil to transfer it to the wall. Black pencil lines may show through.
* Position the overhead projector squarely in front of the wall. If it's angled to one side or the other, it will distort the projected image.


8 Comments:
That sounds so cool. What a fantastic idea. good luck with it and I can't wait to see pics.
I love it. a friend did that for her daughter, she has a hawaiian theme, so they painted the hawaiian flower on the walls. It turned out great.
I saw "wall words" today in a store and thought of you. They are words that you transfer on to the wall, and look really amazing. Anyway, the quote I saw said "Oh, the places you will go! Dr. Seuss"
I looked up the site http://www.wallwords.com/applyit.htm
Good luck!
L. (hoping for my k's)http://www.toadfire.com/blog_full.jsp?blogID=3152
hoping for my k's thanks for thinking of us :-) I like the idea a lot (it would be great for the door) but could not find that quot on the site?
Thanks Berrymomnw and Michell :-) you all are so great thanks for all your support :-)
http://www.writtendecor.com/search.aspx
Found it on this site under Babies :)
L.
http://www.toadfire.com/blog_full.jsp?blogID=3152
Too cool, what a neat idea. Whe you said you're not artists and might make a mess I just remembered the bathroom painting debacle! lol
OH! I love hoping for my k's idea about Oh the places you'll go! How sweet! You could paint the verse around the top of the wall or something...
Tami you are so right LOL.. I lost it tears fighting the works! Painting is a lot harder then i thought it would be. I keep saying this is going to be different (ya right) LMAO
Post a Comment
Subscribe to Post Comments [Atom]
<< Home